


Thank you to everyone who played along with our chipboard challenge last moth.
For Challenge No #66 we would like to see you EMBOSS.
---*---
For Challenge No #66 we would like to see you EMBOSS.
Do you have an embossing machine and folders that you have
ignored for a long time? Do you have lots of embossing powders that are stuffed
in the back of your cupboard?
Then this challenge is perfect for you this month because we want to see you include some form of embossing (wet or dry) on your project.
Then this challenge is perfect for you this month because we want to see you include some form of embossing (wet or dry) on your project.
Be sure and comment with a link to your *newly created* project so we can see and comment on them.
---*---
If you link us to an online gallery, make sure that you only use one for which we do not need to register in order to view/comment
Please also consider to switch of word verification on your blogs if you would like our DT to leave comment. If you are worried about Spam you may want to have commen moderation enabled instead
---*---*---*---*---*---
---*---*---*---*---*---
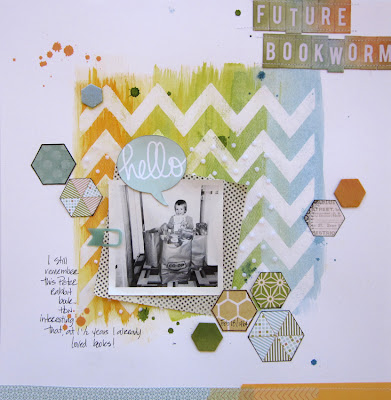
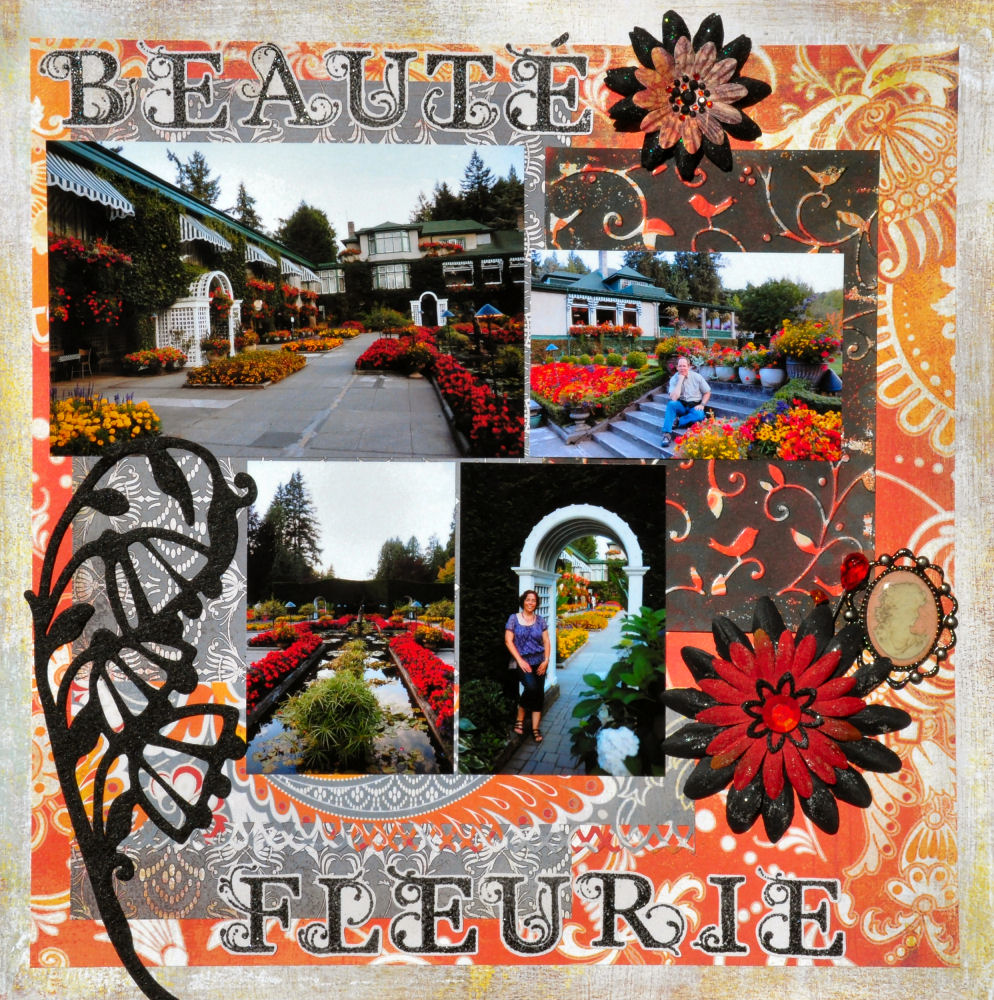
And here are our DT examples to give you an idea on how to emboss on your projects
Aimee
 "I used a Crafter's Workshop stencil and rubbed
an embossing pad over it. Then embossed with clear powder, and painted over it
with watercolor paint. The embossing resists the paint."
"I used a Crafter's Workshop stencil and rubbed
an embossing pad over it. Then embossed with clear powder, and painted over it
with watercolor paint. The embossing resists the paint."
Channa
 "I decided to go with dry and wet embossing. I
think the dry embossing is clear to see, I used my cuttlebug and some folders,
the wet embossing part is the white butterfly"
"I decided to go with dry and wet embossing. I
think the dry embossing is clear to see, I used my cuttlebug and some folders,
the wet embossing part is the white butterfly"
Gabrielle
 “I did wet embossing with mist resist with Lawn
Fawn chevron stamps and October Afternoon art box mists”.
“I did wet embossing with mist resist with Lawn
Fawn chevron stamps and October Afternoon art box mists”.
Jenifer
 “the paper scrap behind the photo is dry embossed”
Martine
 “I heat embossed the letters. I pressure
embossed then heat embossed with clear powder the piece of CS under the photo
at the top right. I inked over it in black, and the raised, embossed parts
resisted.”
“I heat embossed the letters. I pressure
embossed then heat embossed with clear powder the piece of CS under the photo
at the top right. I inked over it in black, and the raised, embossed parts
resisted.”
Nitasha
 “Embossed the card with a Tim Holtz embossing
folder. And also heat embossed the sentiments with Zing”
“Embossed the card with a Tim Holtz embossing
folder. And also heat embossed the sentiments with Zing”
Norine
 “I cut chevron strips from a piece of Bazzill patterned
paper and used that as a stencil for my emboss ink. After clear heat embossing
it, I brushed Mr Huey inks, three shades, and let the resist do it's thang. I
distress inked the alpha stickers and misted some fabric covered octagon
chipboards.”
“I cut chevron strips from a piece of Bazzill patterned
paper and used that as a stencil for my emboss ink. After clear heat embossing
it, I brushed Mr Huey inks, three shades, and let the resist do it's thang. I
distress inked the alpha stickers and misted some fabric covered octagon
chipboards.”
Sarah
 “I heat embossed the label die cut with gold
embossing powder. And the oval underneath it was dry embossed with an embossing
folder. I sponged a little ink over it to show the swiss dots better.”
“I heat embossed the label die cut with gold
embossing powder. And the oval underneath it was dry embossed with an embossing
folder. I sponged a little ink over it to show the swiss dots better.”
Aimee

Channa

Gabrielle

Jenifer

Nitasha

Norine

Sarah


4 comments:
I really love what Jennifer and Shanna made. I wish I could do that too!
have a nice week end
Great challenge and inspiration!!
Here's mine.
Here's a link to my project: http://roxyrolla.blogspot.ca/2012/06/may-project-12-using-counterfeit-kit.html
I had a lot of fun making my own background paper here, thanks for the challenge! Hugs, Roxy.
my card here
http://scrapperita.blogspot.it/2012/06/card-per-un-matrimonio-in-lilla.html
thanks
Post a Comment